Drones are becoming increasingly popular, and building your own DIY drone can be a rewarding project for tech enthusiasts. After building it, you will feel like you are the Ironman or the Elon Musk even though you are not. No Offense. In this interesting blog, I will guide you through the process of creating your very own DIY drone from scratch.
Let’s start with the detailed guide on how to create a DIY drone from scratch:
Table of Contents
1. Understanding the Basic Components
We will first go through the basic components of a drone. The four main components of a drone are the frame, motors, flight controller, and battery.
a. Frame:
The frame is the foundation of your drone and provides a structure for all the other components. When choosing a frame, consider its weight, durability, and compatibility with the size of your motors. You can find frames made up of carbon fiber, aluminum, and plastic. Carbon fiber is mostly used because of its lightweight and strength.
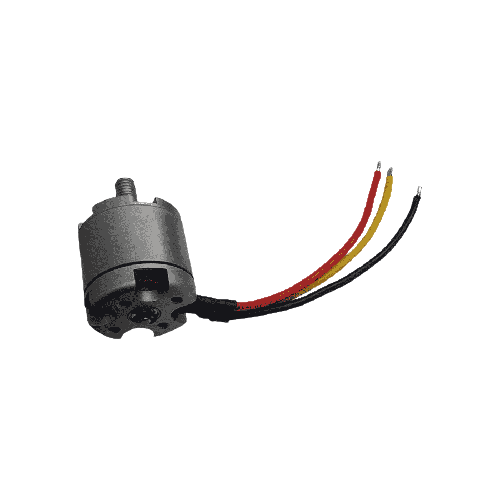
b. Motors:
The motors are responsible for propelling the drone through the air. They are typically brushless and come in different sizes and power ratings. Selection of the motors should be done based on the size of your frame and the weight of your drone. You can find motor recommendations based on the weight of your drone online.
c. Flight Controller:
The flight controller is literally the brain of your drone and is responsible for controlling its movement. It uses sensors and software to adjust the speed of each motor and stabilize the drone. You can find many flight controllers in the market, so choose one that is compatible with your motors and has the features you need. Some popular choices include the Betaflight and Cleanflight controllers.
d. Battery:
The battery is the power source for your drone. It’s necessary to choose a battery that is compatible with your motors and flight controller and has the power capacity to provide enough flight time. The battery also needs to be lightweight to minimize the overall weight of the drone.
2. Choosing the Right Frame
The size and weight of your drone also depends on the frame you are going to use. The frame needs to be sturdy and lightweight to ensure stability during flight.
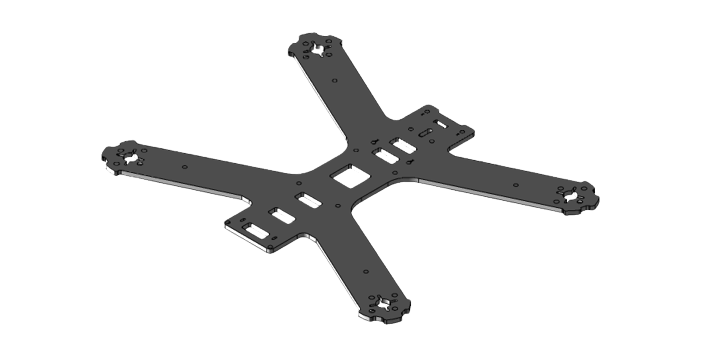
a. Materials:
You can find frames that are made up of materials such as carbon fiber, aluminum, and plastic. Carbon fiber is a popular choice because of its strength and lightweight. Aluminum frames are also durable and can be customized easily. Plastic frames are the most affordable but may not be as sturdy as other materials.
b. Size:
When choosing a frame, consider the size of your motors and the weight of your drone. The frame needs to be compatible with the size of your motors to ensure a stable flight. A frame that is too small for your motors can cause the drone to be unstable and crash.
c. Design:
The design of the frame is also important. Some frames have an X-shaped design, while others have an H-shaped design. The X-shaped design is more stable and agile, while the H-shaped design is more stable in windy situations.
3. Selecting the Motors
Choosing the right motors is essential because they are responsible for propelling the drone through the air. Motors are available in different sizes and power ratings, but you need to choose one that is compatible with your frame and can lift the weight of your drone.
a. Size:
When choosing a motor, consider the size of your frame and the weight of your drone. The motor needs to be compatible with the size of your frame to ensure a stable flight. You can find motor recommendations based on the weight of your drone online.
b. Power Rating:
The power rating of a motor is measured in KV (RPM/volt). Motors with higher KV ratings spin faster and are more powerful. However, they also consume more battery power and generate more heat. Choose a motor with a KV rating that is compatible with your battery and flight controller.
c. Brushless:
Brushless motors are the most popular choice for DIY drones because they are efficient and reliable. They also have a longer lifespan compared to brushed motors. Brushed motors are cheaper but tend to wear out faster and require more maintenance.
4. Installing the Flight Controller
The flight controller will be the brain of your DIY drone and will be responsible for controlling its movement. It uses sensors and software to adjust the speed of each motor and stabilize the drone. Installing the flight controller requires some technical knowledge and experience.
a. Compatibility:
Before installing the flight controller, ensure that it is compatible with your motors and has the features you need. Some popular flight controllers include the Betaflight and Cleanflight controllers.
b. Wiring:
The flight controller is connected to the motors and other components through wiring. Ensure that the wiring is done correctly to avoid short circuits and other electrical issues. Follow the wiring diagram provided by the manufacturer carefully.
c. Calibration:
After installing the flight controller, you need to check it to ensure if it’s working properly or not. Calibration involves configuring the sensors and software to adjust the speed of each motor and stabilize the drone. Follow the calibration instructions provided by the manufacturer carefully.
5. Adding the Battery
The battery is the power source for your DIY drone and needs to be compatible with your motors and flight controller. It’s important to choose a battery that has the capacity to provide enough flight time and is lightweight to minimize the overall weight of the drone.
a. Capacity:
The capacity of the battery is measured in mAh (milliampere-hours) and determines how long your drone is going to fly. Choose a battery with a capacity that is compatible with your motors and flight controller and provides enough flight time.
b. Weight:
The weight of the battery is also important. Choose a battery that is lightweight to minimize the overall weight of the drone. A heavy battery can affect the stability and performance of the drone.
c. Safety:
Ensure that the battery is properly installed and secured to avoid it from falling during flight. Do not overcharge the battery and always use a charger recommended by the manufacturer otherwise your drone will turn into a firecracker mid-air.
6. Adding the Propellers
Propellers are responsible for creating the lift that propels the drone through the air. They come in various sizes and shapes, and you need to choose the right propellers that will be compatible with the power of the motor.
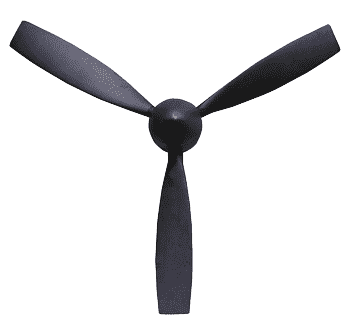
a. Size:
The size of the propellers should match the size of your motors. Otherwise the propellers that are too big or too small can disrupt the balance of the drone.
b. Material:
Propellers also comes in different materials like plastic, carbon fiber, and wood. Plastic propellers are the most affordable but may not be as durable as other materials. Carbon fiber propellers are stronger and lighter but are more expensive. Wooden propellers are also available but are not as common.
c. Shape:
Propellers comes in many style such as two-blade and three-blade. Two-blade propellers are more efficient and create less noise, while three-blade propellers provide more lift and stability.
7. Testing and Calibration
After assembling the drone, it’s important to test it to ensure that it’s working properly. Testing and calibration involve checking the motors, flight controller, and sensors to ensure that they are functioning properly.
a. Flight Test:
Before taking your DIY drone on its first flight, perform a test flight in a controlled environment like an open field. Ensure that the drone is stable and responsive to your commands.
b. Calibration:
Calibration involves adjusting the sensors and software to ensure that the drone is stable and responsive. Follow the calibration instructions provided by the manufacturer carefully.
c. Troubleshooting:
In case of any issues during testing and calibration, troubleshoot the problem by checking the wiring, sensors, and other components. Follow the troubleshooting instructions provided by the manufacturer carefully.
d. Fine-Tuning:
Once the drone is working properly, you can fine-tune its settings to optimize its performance. Fine-tuning involves adjusting the flight controller settings such as PID values, which determine the stability and responsiveness of the drone.
8. Adding Accessories
Once you are done building your DIY drone, you can add some accessories to increase its functionality and performance. Some popular accessories include cameras, GPS, and LED lights.
a. Cameras:
Adding a camera to your drone allows you to capture aerial footage and images. There are different types of cameras available, such as action cameras and FPV (First-Person-View) cameras. Ensure that the camera is compatible with your drone and has the features you need.
b. GPS:
Adding a GPS module to your drone allows you to track its location and plan routes. GPS also provides stability and helps the drone maintain its position in windy conditions. Ensure that the GPS module is compatible with your flight controller and has the features you need.
c. LED Lights:
Adding LED lights to your drone not only enhances its aesthetics but also improves its visibility during low-light conditions. You can use different types of LED lights such as strip lights and spotlights. Ensure that the LED lights are compatible with your drone and have the features you need.
9. Safety Precautions
When building and flying a DIY drone, it’s important to take precautions to avoid accidents and injuries. Here are some safety precautions to keep in mind:
a. Fly in Safe Areas:
Fly your drone in safe areas such as open fields or designated flying areas. Avoid flying in crowded areas or near airports.
b. Follow Local Regulations:
Ensure that you are aware of the local regulations regarding drone flying in your area. Follow the rules and regulations to avoid fines or legal issues.
c. Fly in Good Weather Conditions:
Avoid flying your drone in bad weather conditions such as rain, snow, or strong winds. Bad weather can affect the stability and performance of the drone.
d. Maintain Your Drone:
Regularly maintain your drone to ensure that it’s working properly. Check the components such as the motors, battery, and wiring for any signs of wear and tear.
Conclusion:
Building a DIY drone from scratch can be a rewarding and exciting experience. However, it requires some technical knowledge and experience. By following the steps we talked above, you can build a functional and efficient drone and modify it as per your needs.
Remember to always follow safety precautions when building and flying your drone, and regularly do its full body check-ups to ensure its longevity. With a little patience and dedication, you can build a drone that is not only functional but also a work of art.
Frequently Asked Questions
How much will it cost to build a cheap DIY drone?
The cost of building a DIY drone can vary depending on the quality of components and features you choose. On average, a cheap DIY drone can be built for around $200 to $500.
Where can I source the materials needed to build a drone?
You can find the necessary components online from specialized drone retailers, electronics stores, or websites dedicated to DIY projects.
What skills do I need to build a DIY drone?
Basic soldering skills, understanding of electronics, and some knowledge of flight principles are helpful. However, many tutorials provide step-by-step instructions for beginners.
Do I need a license or registration for my DIY drone?
Regulations vary by country and region. Check with your local aviation authority to understand if a license or registration is required for recreational drone use.
What are the advantages of building a DIY drone compared to buying a pre-built one?
Building a DIY drone allows for customization, knowledge and understanding of its components, cost savings, and the satisfaction of creating something with your own hands.
Disclaimer:
The information provided in this article is intended for educational and informational purposes only. The DIY drone project involves technical skills, and the author cannot be held responsible for any damage, injury, or loss that may result from following the instructions provided in this article. The author advises readers to exercise caution and safety measures while building and flying their DIY drones. The author does not endorse any particular product, brand, or service mentioned in this article. Readers are responsible for their own actions and decisions, and the author disclaims any liability or responsibility for any consequences arising from them.